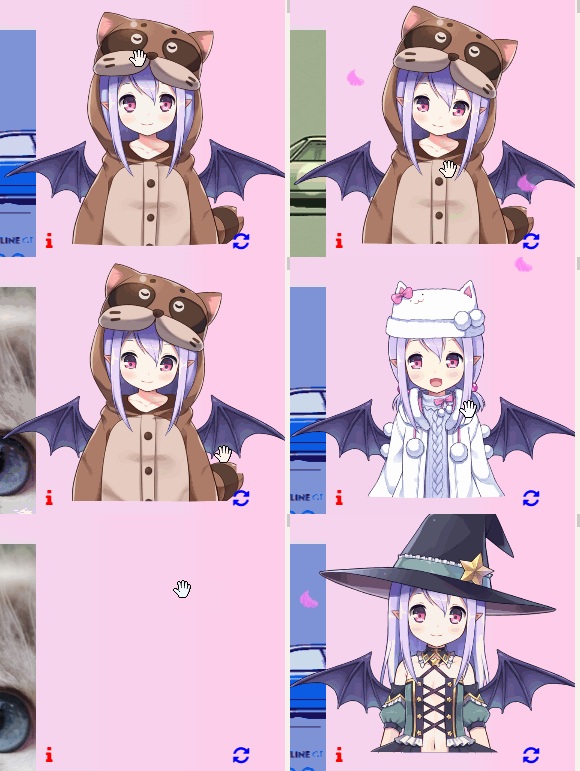
首先下载相关文件看板娘文件
点这里可以看我的个人主页,里面有看板娘的实际演示。http://www.songzx.top/songzx/me/
看板娘演示

这个看板娘是我从看板娘文件的一个登录测试页面中移植出来的,就是demo文件夹中的login.html文件。大家可以用浏览器打开login.html文件查看原本的看板娘形态。
因为我没有系统地学过html语言,教程中难免会出现错误,欢迎大家指正,大家可以直接反馈到我的个人邮箱。
看板娘文件从网络上获取,若侵犯到您的权利,请及时联系我删除。
首先把看板娘文件复制到网页根目录,也就是有页面html文件的目录。
然后用编辑器打开html网页文件,首先在html文件的<head>头部信息中引人live2d.min.js文件
代码
<script src="live2d.min.js"></script>
画横线的就是加到网页里的代码,大家会发现代码和login.html文件里的<script src="../live2d.min.js"></script>不一样,这是因为src后面是引入脚本文件的路径,而login.html文件是在dome文件夹里的,所以login.html文件想要live2引入live2d.min.js文件就要从上级目录中引入,而我们的网页文件就是在live2d.min.js文件的所在目录,所以不需要加上”../”,所以大家也不难猜出 “ .. ” 的意思就是返回上级目录,” / ”是不同目录之间的分隔符号,在命令行中输入“..“就可以返回上一目录,大家可以试试。

再在<head>里引入样式表
<link rel="stylesheet" href="https://cdn.jsdelivr.net/npm/bootstrap/dist/css/bootstrap.min.css">
<link rel="stylesheet" href="https://cdn.jsdelivr.net/npm/font-awesome/css/font-awesome.min.css">

然后在样式表中定义看板娘的相关属性。
在<style type="text/css">中插入以下代码。对看板娘的属性修改代码的注释中有相关解释。
#kbn {
 position: fixed; /*这个是看板娘的位置属性,不必更改*/
 bottom: 0px;     /* 这个是看板娘距离底部的距离,单位是像素。 */
 width: 290px;   /* 这个是看板娘下边两个按钮之间的距离。 */
 right: 0px;     /* 这个是看板娘距离右边的距离。 */
 z-index: 999;
 }
#stage {
 position: relative;
}
#stage a {
 position: absolute;
 width: 2em;
 height: 2em;
 border-radius: 50%;
}
#inner {
 position: relative;
 background-color: #;   /* 这个是看板娘背后圆形背景的颜色,#代表透明 */
 clip-path: circle(220px at center);   /* 这个是形式及大小 */
 -webkit-clip-path: circle(220px at center);
}
#text {
 position: absolute;
 bottom: 30%;
 font-size: 2em;
 left: 50%;
 transform: translateX(-50%);
 opacity: 0.4;
 font-weight: bold;
}
#info {
 left: 40px;
 bottom: 20px;
 color: #FF0000;   /* 这个是看板娘下面左边按钮的颜色 */
}
#refresh {
 right: 30px;
 bottom: 20px;
 color: #0000FF;   /* 这个是看板娘下面右边按钮的颜色 */
}
#live2d {
 cursor: grab;
 height: 300px;   /* 这个是看板娘的高度 */
 width: 300px;   /* 这个是看板娘的宽度,修改这两个就可以改变看板娘的大小。 */
}
#live2d:active {
 cursor: grabbing;
}
然后在<html>中插入以下代码。
<div id="kbn" class="text-center">

    <div id="stage">
        <div id="inner">
            <div id="cover">

                <div id="detail"></div>
                <div id="handle"></div>
            </div>
            <canvas class="mb-4" id="live2d" width="800" height="800"></canvas>
        </div>
        <a id="info" href="javascript:info()"><i class="fa fa-lg fa-info"></i></a>
        <a id="refresh" href="javascript:refresh()"><i class="fa fa-lg fa-refresh"></i></a>

<script>
/*
 * _(:з」∠)_
 * Created by Shuqiao Zhang in 2019.
 * https://zhangshuqiao.org
 */

/*
 * This program is free software: you can redistribute it and/or modify
 *  it under the terms of the GNU General Public License as published by
 *  the Free Software Foundation, either version 3 of the License, or
 *  (at your option) any later version.
 *
 * This program is distributed in the hope that it will be useful,
 *  but WITHOUT ANY WARRANTY; without even the implied warranty of
 *  MERCHANTABILITY or FITNESS FOR A PARTICULAR PURPOSE.  See the
 *  GNU General Public License for more details.
 */
window.addEventListener("load", () => {
    "use strict";

    if (!CSS.supports("clip-path", "circle(120px at center)") && !CSS.supports("-webkit-clip-path", "circle(120px at center)")) {
        document.getElementById("stage").innerHTML = '<img src="../assets/screenshot-1.png">';
        return;
    }

    var apiPath = "https://live2d.fghrsh.net/api", state = 0,
        modelId = localStorage.getItem("modelId"),
        modelTexturesId = localStorage.getItem("modelTexturesId");
    if (modelId === null) {
        modelId = 1;
        modelTexturesId = 53;
    }
    loadModel(modelId, modelTexturesId);

    function loadModel(modelId, modelTexturesId) {
        localStorage.setItem("modelId", modelId);
        if (modelTexturesId === undefined) modelTexturesId = 0;
        localStorage.setItem("modelTexturesId", modelTexturesId);
        loadlive2d("live2d", `${apiPath}/get/?id=${modelId}-${modelTexturesId}`, null);
        console.log("live2d", `模型 ${modelId}-${modelTexturesId} 加载完成`);
        setTimeout(() => {
            coverPosition("20%");
            state = 2;
        }, 2);
    }

    function loadRandModel() {
        var modelId = localStorage.getItem("modelId"),
            modelTexturesId = localStorage.getItem("modelTexturesId");
        fetch(`${apiPath}/rand_textures/?id=${modelId}-${modelTexturesId}`)
            .then(response => response.json())
            .then(result => {
                loadModel(modelId, result.textures.id);
                setTimeout(() => {
                    state = 2;
                    coverPosition("20%");
                    document.getElementById("refresh").setAttribute("href", "javascript:refresh()");
                }, 1);
            });
    }

    function loadOtherModel() {
        var modelId = localStorage.getItem("modelId");
        fetch(`${apiPath}/switch/?id=${modelId}`)
            .then(response => response.json())
            .then(result => {
                loadModel(result.model.id);
            });
    }

    function coverPosition(pos) {
        document.getElementById("cover").style.bottom = pos;
    }


    window.refresh = function() {
        state = 0;
        coverPosition("10%");
        document.getElementById("refresh").setAttribute("href", "javascript:void(0)");
        setTimeout(loadRandModel, 1);
    }
    window.info = function() {
        fetch("https://v1.hitokoto.cn")
            .then(response => response.json())
            .then(result => {
                alert("「" + result.hitokoto + "」——" + result.from);
            });
    }


});
</script>
</div >
</div>
到这里打开页面就可以在右下角看见看板娘了,因为是移植的代码,所以功能不怎么完善,有时间我会出一个完善版的教程。敬请期待。
--------------------------------本教程由光阴似水1204原创,可自由转载,转载请附上本文网址,并标注来源。
文章留言